
 QuickEstimate Team
Knowing how to estimate flooring accurately is what keeps a flooring business profitable. The material math looks easy: measure the room, multiply by the price per square foot. But the real cost lives in the details: waste on cuts and patterns, subfloor prep, removing the old floor, trim, transitions and moving furniture. Leave any of them out and the job that looked profitable on paper quietly loses money.
This guide walks through a complete flooring estimate step by step, with waste factors for common layouts, a labor breakdown and a worked example you can copy.
Key takeaways
- Measure every room separately, then add a waste factor based on the layout and material.
- Round material up to full boxes or rolls. You can’t buy 27.2 boxes.
- Subfloor prep, tear-out, trim and transitions are where flooring estimates usually fall short.
- Price labor at its true hourly cost, then add overhead and profit on purpose.
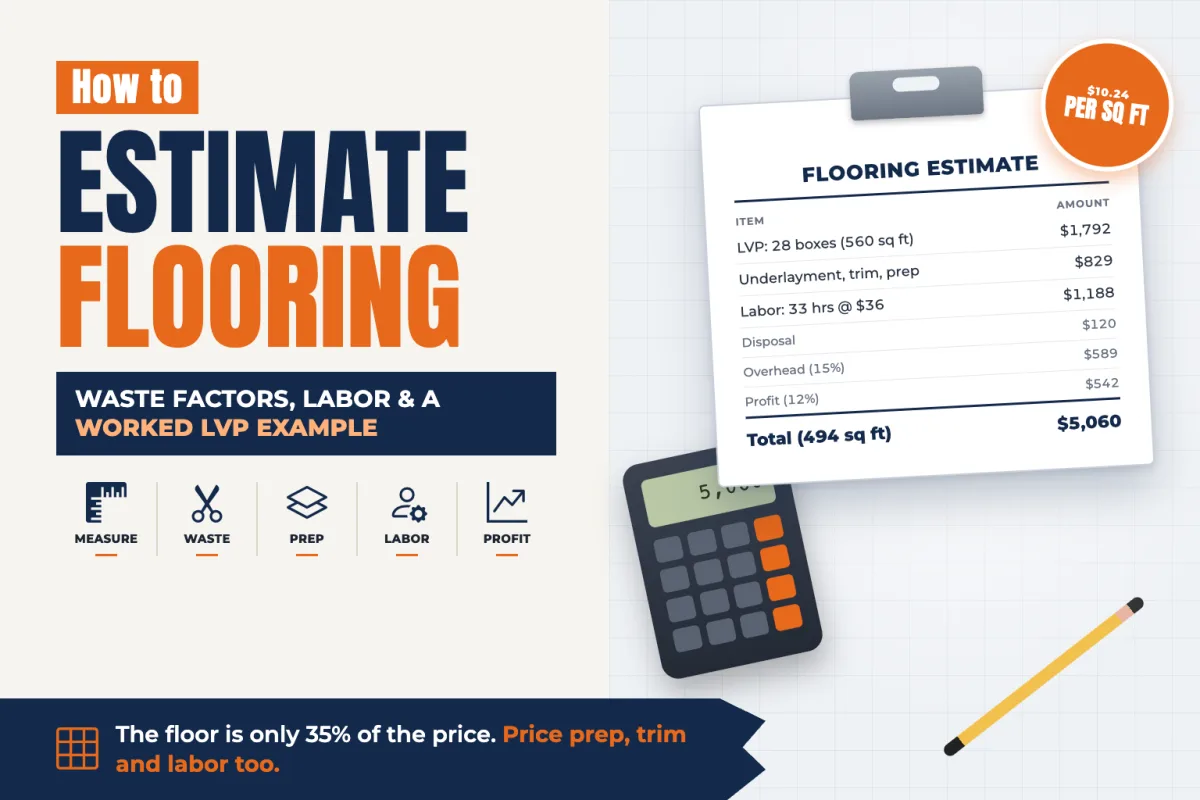
- In our example, 494 sq ft of vinyl plank comes to about $10.24 per sq ft installed.
What goes into a flooring estimate
Every flooring estimate, whether it’s carpet, vinyl plank, laminate, hardwood or tile, is built from the same parts:
- Flooring material, including waste, rounded up to full boxes or rolls
- Underlayment and moisture barriers, where the product needs them
- Subfloor prep: leveling compound, patching, fastening squeaks, moisture testing
- Tear-out and disposal of the existing floor
- Trim and transitions: quarter round, baseboard, thresholds, stair nosing
- Labor for every task, not just installation
- Overhead and profit
Step 1: Visit the site and define the scope
Before you measure, understand the job. On the walkthrough, check:
- The existing floor. What has to come up? Carpet and pad is quick. Glued-down tile or sheet vinyl can take much longer.
- The subfloor. Look for dips, humps, soft spots, squeaks and moisture. Many products specify how flat the subfloor must be, and fixing it is real work.
- Room layout. Closets, hallways, angled walls and many doorways all increase cuts and waste.
- Stairs. Price stairs per step, not per square foot.
- Furniture and appliances. Who moves them? Refrigerators and pianos need planning.
- Trim and doors. Will baseboards come off? Will doors need trimming to clear a thicker floor?
Write down what’s included and excluded. “Install new floor” means something very different to a homeowner than to you.
Step 2: Measure every room
Measure each room separately, including closets and hallways. For simple rectangular rooms:
Area = length × width
For L-shaped or irregular rooms, split the space into rectangles, measure each one, and add them together. Measure to the wall, not the baseboard, and note which direction the flooring will run. It affects cuts, seams and waste.
Don’t subtract for small areas like kitchen islands unless they’re large. The cutting around them usually uses as much material as you’d save.
Step 3: Add the right waste factor
Waste covers cut-offs, pattern matching, damaged pieces and the small offcuts you can’t reuse. The right percentage depends on the product, the layout and the room shape. Common starting points:
| Layout | Typical waste factor |
|---|---|
| Straight lay, simple rooms | 5–10% |
| Many small rooms, closets or angles | 10–15% |
| Diagonal installation | 10–15% |
| Herringbone or chevron patterns | 15–20% |
| Carpet with seams and pattern repeat | Plan by roll width and seam layout |
Always check the manufacturer’s installation guide, and adjust with experience. Then round up to full boxes, cartons or rolls. Many contractors also leave the client a few spare planks or tiles for future repairs, which clients appreciate.
One more tip: order everything for a job from the same production run where you can, and check lot numbers when the delivery arrives. Color and finish can vary between batches, and discovering a mismatch halfway through an install is expensive. If the client wants spare material for future repairs, add it to the flooring estimate as its own line so they know they’re paying for extra boxes, not waste.
Step 4: Price materials and extras
Once you have quantities, price everything the job needs, not just the floor itself:
- Flooring at the current supplier price, by the box or roll
- Underlayment, unless the product has an attached pad
- Moisture barrier for concrete subfloors where required
- Leveling compound and patching materials
- Adhesive, fasteners, spacers and caulk
- Trim: quarter round or shoe molding, baseboard if replacing
- Transitions: T-molding, reducers, thresholds and end caps at every doorway and floor change
- Stair parts: nosing, treads and risers
Count transitions at every doorway where the new floor meets a different surface. They’re small items that are easy to miss and add up quickly.
Step 5: Estimate labor by task
Installation is only part of the labor. Break the job into tasks:
- Moving furniture and appliances
- Removing and disposing of the old floor
- Subfloor prep: leveling, patching, fastening
- Acclimating material where the manufacturer requires it
- Installing the flooring
- Installing trim, transitions and stair parts
- Cleanup and walkthrough
Use your own crew’s production rates, such as square feet per hour for each product and linear feet per hour for trim. Track them on a few jobs and your estimates will be far more reliable than any published average.
What does an hour of flooring labor really cost?
According to the U.S. Bureau of Labor Statistics, the median pay for flooring installers and tile and stone setters was $26.15 an hour in May 2025. Add payroll taxes, workers’ comp, insurance and benefits and that hour typically costs $34 to $39 before overhead or profit. See our guide to your contractor hourly rate, or use the employee cost calculator for your exact figure.
Step 6: Add overhead and profit
Materials and labor don’t cover your van, insurance, tools, marketing or the hours spent estimating. That’s overhead, and it needs to be recovered on every job. Then add profit deliberately. Watch the math: a 20% markup is only a 16.7% margin, which our guide to markup vs margin explains. For the overhead number, see how to calculate overhead percentage.
Step 7: Send a clear flooring proposal
List the rooms, the product and color, what’s included (tear-out, prep, trim, transitions, furniture moving) and what isn’t. Offer a good-better-best product choice where it makes sense. Put an expiry date on the price, since flooring material costs can change. Our guide on how to write a construction proposal covers the structure.
Offer good, better and best flooring options
One of the easiest ways to win more flooring jobs, and raise the average ticket, is to present options instead of a single price. Keep the scope the same and change the product:
| Option | Example | Why it helps |
|---|---|---|
| Good | Entry-level LVP, standard underlayment | Meets a tight budget |
| Better | Thicker wear layer, attached pad, upgraded trim | Often the most popular choice |
| Best | Engineered hardwood or premium LVP, new baseboards | Shows the top end and anchors value |
Build each option from your real costs so every one earns your target margin. Many clients choose the middle option rather than asking for a discount.
How to estimate flooring: worked example
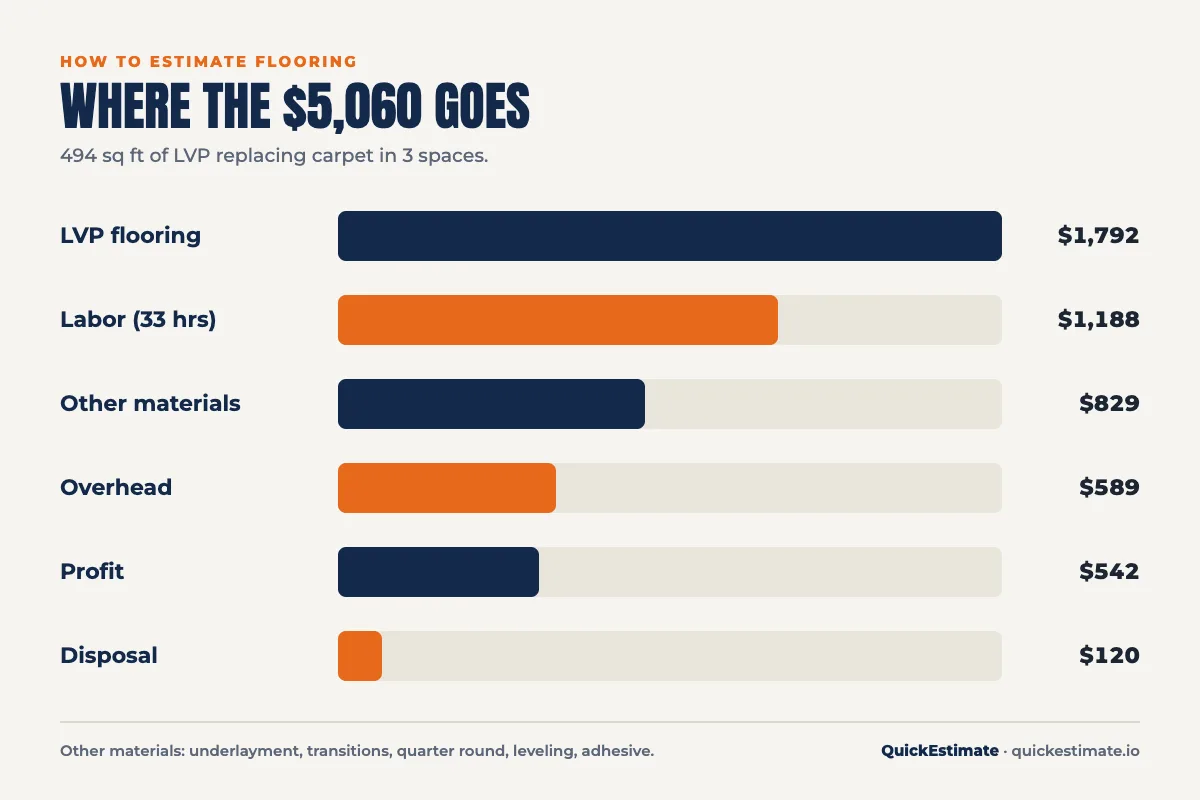
Here’s a complete flooring estimate for luxury vinyl plank (LVP) in a living room (15 × 18 ft), hallway (4 × 20 ft) and bedroom (12 × 12 ft), replacing old carpet. Prices and production rates are examples, so use your own.
Area: 270 + 80 + 144 = 494 sq ft. With 10% waste, that’s 543 sq ft, or 28 boxes at 20 sq ft per box (560 sq ft).
| Materials | Detail | Amount |
|---|---|---|
| LVP flooring | 560 sq ft × $3.20 | $1,792 |
| Underlayment | 520 sq ft × $0.50 | $260 |
| Transitions | 4 × $35 | $140 |
| Quarter round | 21 pieces (168 lf) × $9 | $189 |
| Leveling compound | 4 bags × $40 | $160 |
| Adhesive, fasteners, caulk | $80 | |
| Materials total | $2,621 |
Labor, using example production rates:
- Move furniture: 2 hours
- Remove and bag old carpet and pad: 494 sq ft at about 100 sq ft/hr = 5 hours
- Subfloor prep and leveling: 6 hours
- Install LVP: 494 sq ft at about 40 sq ft/hr = 12.5 hours
- Quarter round: about 150 lf at 40 lf/hr = 4 hours
- Transitions: 4 at 30 minutes = 2 hours
- Cleanup and walkthrough: 1.5 hours
- Total: 33 hours
Now build the price:
- Labor cost: 33 hours × $36 true hourly cost = $1,188
- Disposal fee: $120
- Direct cost: $2,621 + $1,188 + $120 = $3,929
- Overhead at 15%: $589, bringing cost to $4,518
- Profit at 12% markup: $542
- Price to the client: $5,060, or about $10.24 per sq ft installed
Notice that the flooring itself is only about 35% of the price. A flooring estimate built from “material price plus a bit for labor” would miss most of what this job actually costs.
Estimating by flooring type
The steps are the same for every material, but each has its own quirks:
- Vinyl plank and laminate: usually fast to install, but sensitive to subfloor flatness. Budget prep time and transitions.
- Hardwood: slower installation, acclimation time, possible sanding and finishing on site, and higher waste on short or random-length boards.
- Tile: much slower per square foot, with backer board, thinset, grout, cutting and possibly waterproofing. Large-format tile often needs a very flat substrate.
- Carpet: priced around roll widths and seams, plus pad, tack strip and stairs. Plan the seam layout before you order.
Keep separate production rates for each type. A crew that installs a lot of LVP in a day may cover far less ground on tile.
Concrete subfloors and moisture
Concrete slabs are common in basements, condos and slab-on-grade homes, and they bring a specific risk: moisture. Many flooring products and adhesives have moisture limits, and installing over a slab that’s too wet can lead to failures that come back to you.
If the job is over concrete, build these into the flooring estimate:
- Moisture testing using the method the manufacturer specifies
- A moisture barrier or vapor retarder where required
- Grinding high spots and filling low spots
- Extra drying time if the slab is new
If you can’t test before pricing, list it as an assumption and price mitigation as an option. That protects you and shows the client you know what you’re doing.
Commercial flooring estimates
Commercial flooring follows the same process, with a few extra items to price into the flooring estimate: specified products and installation methods, night or weekend work to avoid disrupting a business, phased installation in occupied spaces, floor protection for other trades, and submittals and warranty paperwork. Carpet tile and sheet goods in large open areas can be fast per square foot, but moving furniture and working around people often isn’t.
Read the specifications carefully, list your inclusions and exclusions line by line, and price anything unusual as a separate item.
How to estimate stairs
Stairs are slow, detailed work. Price them per step, not per square foot. Each step can involve a tread, riser and nosing, plus cutting and fitting around the stringers and landing. Landings are measured separately. Many flooring contractors set a fixed price per step for each material, built from their own time on past jobs.
How to estimate flooring faster
A fast, accurate flooring estimate wins jobs. A few habits help:
- Use a laser measure and sketch each room on the spot with its dimensions and flooring direction.
- Keep a standard checklist for every walkthrough: existing floor, subfloor, stairs, transitions, furniture, trim.
- Save your waste factors and production rates by product so you’re not deciding them fresh every time.
- Keep supplier prices current, especially for products you install often.
- Build templates for common jobs like a single-room LVP install or a whole-floor carpet replacement.
With this in place, most residential flooring estimates can go out the same day as the site visit.
Explaining your flooring estimate to clients
Clients often compare your installed price with the per-square-foot price they saw in a store and wonder where the difference comes from. Break the flooring estimate into clear groups (material, removal, prep, installation, trim and transitions) so they can see what’s included. Point out the items a cheaper quote may have left out, such as leveling, disposal or new quarter round. A clear breakdown builds trust and makes price comparisons fairer.
Flooring estimate mistakes to avoid
- Too little waste. Running short mid-job can mean a different dye lot or a delay.
- Ignoring subfloor prep. Leveling a bad floor can take as long as installing the new one.
- Forgetting tear-out and disposal. Especially glued-down floors.
- Missing transitions and trim. Count every doorway.
- Pricing stairs by square foot. They take far longer than the area suggests.
- No expiry date. Material prices move, so protect yourself.
Flooring estimate checklist
- Every room, closet and hallway measured separately
- Waste factor chosen for the layout and product
- Material rounded up to full boxes or rolls
- Underlayment, moisture barrier and leveling included where needed
- Tear-out, disposal and furniture moving priced
- Trim, transitions and stair parts counted
- Labor estimated by task at your true hourly cost
- Overhead and profit applied, and an expiry date on the proposal
Flooring estimating software
Once you’re pricing several jobs a week, rebuilding every flooring estimate in a spreadsheet gets slow and error-prone. Flooring estimating software like QuickEstimate keeps your product prices, waste factors, production rates, overhead and markup in one place. Build the estimate from saved items, send a branded proposal with good-better-best options, and let the client approve it online.
Frequently asked questions
How do you estimate flooring for a room?
Measure the room’s length and width to get square feet, add a waste factor (often 5 to 15% depending on layout), round up to full boxes, then add underlayment, prep, trim, transitions, labor, overhead and profit.
How much extra flooring should I order?
Most straight-lay jobs need 5 to 10% extra. Diagonal layouts and rooms with many angles often need 10 to 15%, and herringbone or chevron patterns can need 15 to 20%. Check the manufacturer’s guidance.
How do I estimate flooring labor?
Break the job into tasks such as furniture moving, tear-out, prep, installation, trim and cleanup. Multiply each by your crew’s production rate, then multiply total hours by your true hourly labor cost.
Should I charge per square foot for flooring?
Per-square-foot pricing is common and easy for clients to compare, but build it from your real costs first. Price extras like stairs, tear-out, leveling and transitions separately.
How much does subfloor prep add to a flooring estimate?
It depends entirely on condition. A flat, clean subfloor may need almost nothing. A floor with dips, damage or moisture issues can add many hours and materials. Always inspect before you price.
What should a flooring estimate include?
A complete flooring estimate should list the rooms and square footage, the product and color, waste allowance, underlayment, subfloor prep, tear-out and disposal, trim and transitions, labor, and the total price with an expiry date and payment terms.
How do I estimate flooring for stairs?
Price stairs per step rather than per square foot. Each step can include a tread, riser and nosing, plus careful cutting and fitting, so it takes much longer than its area suggests. Measure and price landings separately.
The bottom line
Learning how to estimate flooring well means pricing the whole job, not just the floor: accurate measurements, the right waste factor, prep, tear-out, trim, transitions, labor by task, overhead and profit. Get those right and every flooring job pays what it should.
Want faster, more accurate flooring estimates? Try QuickEstimate free and send your next flooring proposal in minutes.