
 Reed Jason
Knowing how to estimate electrical work is what separates electrical contractors who grow from the ones who stay busy and broke. Two shops can do the same quality of work, and the one with the better estimating process will keep more of every job. Price too high and you lose the bid. Price too low and you win work that quietly drains your cash.
This guide walks through the exact process: reading the scope, doing a takeoff, pricing materials and labor, and adding overhead and profit. There’s a full worked example with real math, so you can see how the numbers come together on an actual job.
Key takeaways
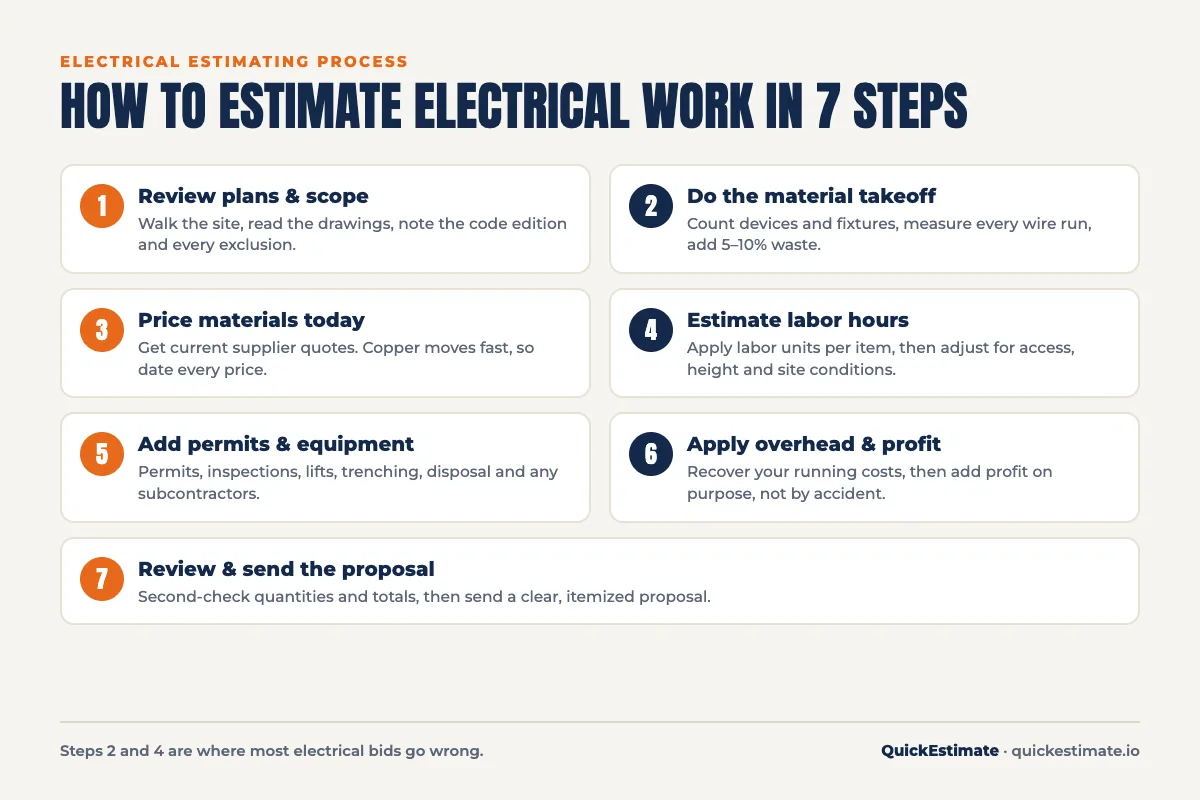
- A reliable electrical estimate follows the same seven steps every time: scope, takeoff, materials, labor, extras, overhead and profit, then a review.
- Labor is usually the biggest cost in an electrical estimate, so track your crew’s real hours and build your own labor units.
- Measure wire runs instead of guessing, and add 5 to 10% for waste.
- Price labor at its true cost (wage plus burden), not the hourly wage.
- Calculate overhead from your books and add profit on purpose.
Why electrical estimates go wrong
Electrical work is harder to estimate than most trades because so much of it is hidden. Wire runs go through walls and ceilings you can’t see yet. Access changes everything: pulling wire through an open stud wall is a different job from fishing it through a finished one. And copper prices can move enough in a few months to wipe out the margin on a job you priced last quarter.
Most bad electrical estimates come from the same few places:
- Counting devices but guessing at wire footage
- Using “best day” labor rates instead of real crew productivity
- Forgetting permits, inspections, lifts and disposal
- Adding a flat percentage on top instead of calculating real overhead
A repeatable process fixes all four. Here is how to estimate electrical work the same way on every job.
Step 1: Review the plans and define the scope
Before you count a single outlet, get clear on what you’re actually pricing. Walk the site if you can. Read the drawings, including the electrical plan, the reflected ceiling plan and the panel schedule if there is one.
While you review, write down:
- The code edition the local jurisdiction enforces. Most U.S. jurisdictions adopt a version of the National Electrical Code (NFPA 70), but not always the newest one, and code changes can add AFCI, GFCI or surge protection requirements that affect your material list.
- Existing conditions, such as panel capacity, grounding, old wiring that will need to be replaced, and finished surfaces you’ll have to work around.
- What’s excluded. Patching drywall, low-voltage, fixtures supplied by the owner, trenching. If it isn’t in writing, the client will assume it’s included.
Ten minutes spent on scope before you start an electrical estimate saves hours of arguing about change orders later. If you don’t have one, a simple construction estimate template gives you a checklist so nothing gets skipped.
Step 2: Do the electrical material takeoff
The takeoff is where you turn drawings into quantities. It’s the most tedious part of learning how to estimate electrical work, and it’s the part that matters most.
Count by category, one category at a time:
- Devices: receptacles (standard, GFCI, AFCI, USB), switches, dimmers
- Lighting: recessed cans, surface fixtures, exterior lights, exhaust fans
- Distribution: panels, subpanels, breakers, disconnects, meter work
- Wire and cable: measured runs by type and gauge
- Raceway and fittings: conduit, boxes, connectors, straps
- Safety devices: smoke and CO detectors, surge protection
Don’t guess wire footage. Measure each home run from the panel, add the vertical drops, and add slack at every box. Then add 5 to 10% for waste. Guessing wire is the fastest way to lose money on a residential job, because the error multiplies across every circuit.
Mark each item on the drawing as you count it for the electrical estimate. It sounds basic, but it’s the only reliable way to avoid counting the same room twice or skipping the garage.
Step 3: Price materials at today’s cost
Once you have quantities, price them. Material pricing is where an electrical estimate goes stale fastest. Use current supplier quotes, not the price list you saved last spring. Copper wire, breakers and panels can shift noticeably over a few months, and supply-chain delays on gear such as panels and transformers can push you into more expensive substitutes.
A few habits that protect you:
- Date every price in your estimate, and put a validity window on your proposal (for example, 30 days).
- Add a small allowance for connectors, straps, wire nuts and tape. They’re cheap individually but add up to real money across a job. Around 5% of materials is a common starting point.
- Separate owner-supplied fixtures clearly, so you’re pricing labor only for those.
Step 4: Estimate labor hours with labor units
Labor is usually the biggest cost on an electrical job, and the hardest to get right. The most reliable method is labor units: a set number of hours for each item installed.
For example, you might assign 0.6 hours to rough in and trim a standard receptacle, or 6 hours to set and wire a 100-amp subpanel. Multiply each item by its unit, add them up, and you have base labor hours.
Industry manuals publish labor units, but the best source is your own job history. Track how long your crew actually takes on common tasks, and your estimates will get sharper every month. We covered this in more depth in our guide to labor burden in estimates.
Then adjust the base hours for conditions, because no two sites are the same when you estimate electrical work:
- Working in finished walls or occupied homes: add time
- High ceilings, lifts or tight crawlspaces: add time
- Repetitive work, such as identical units in a multi-family job: you can often subtract a little
What does an hour of labor really cost?
Don’t price labor at the wage you pay. According to the U.S. Bureau of Labor Statistics, the median pay for electricians was $30.38 per hour in May 2025. On top of wages you pay payroll taxes, workers’ comp, insurance, benefits and paid time off, which commonly add 30 to 50%. That puts the true cost of that hour somewhere around $40 to $45 before overhead or profit. Our free employee cost calculator works out your exact number.
Step 5: Add permits, equipment and subcontractors
These are the costs that don’t show up on a device count, so they’re easy to forget:
- Permit and inspection fees (check the local fee schedule)
- Equipment rental: lifts, trenchers, wire pullers
- Subcontractors: trenching, concrete cutting, low-voltage, fire alarm
- Utility coordination and service upgrade fees
- Disposal and cleanup
List them as their own line items. It makes your estimate easier to check, and it shows the client you’ve thought about the whole job.
Step 6: Apply overhead and profit
Now you have your direct costs: materials, labor, permits and equipment. The price still has to cover the cost of running your business and leave a profit.
Overhead is everything that isn’t tied to a single job: your truck payments, fuel, insurance, office rent, software, phones and the hours you spend estimating. Calculate it from your real numbers rather than using a rule of thumb. Our guide on calculating construction overhead percentage shows how.
Profit is what’s left after every cost is paid, and it should be added on purpose. A common mistake is confusing markup with margin: a 20% markup on cost is only a 16.7% margin on the price. Use a markup calculator to get the numbers right, and read our guide to profit margin for contractors if you’re not sure what to target.
Step 7: Review the estimate and send the proposal
Before any electrical estimate goes out, have a second person check it, or at least step away for an hour and check it yourself. Look for:
- Quantities that don’t match the drawings
- Labor hours that look too low for the size of the job
- Missing line items: permits, disposal, lifts
- Math errors in totals
Then send a clear, itemized proposal with your scope, exclusions, price, payment terms and an expiry date. Clients trust an electrical estimate they can understand.
How to estimate electrical work: a worked example
Here’s how the process looks on a real job: electrical for a 1,200 sq ft basement finish with open framing. Material prices are illustrative, so use your supplier’s current pricing.
| Item | Qty | Materials | Labor hours |
|---|---|---|---|
| Receptacles (incl. GFCI) | 28 | $252 | 16.8 |
| Switches and dimmers | 10 | $100 | 5.0 |
| Recessed LED lights | 16 | $448 | 12.0 |
| Smoke/CO detectors | 2 | $90 | 1.0 |
| 100A subpanel and breakers | 1 | $420 | 6.0 |
| NM cable, 990 ft (incl. 10% waste) | 990 ft | $842 | 10.0 |
| Fittings and consumables (5%) | – | $108 | – |
| Subtotal | $2,260 | 50.8 |
Now build the price:
- Adjust labor: add 10% for low ceilings and ductwork, so 50.8 hours becomes 56 hours.
- Labor cost: 56 hours × $45 true hourly cost = $2,520.
- Permit: $250.
- Direct cost: $2,260 + $2,520 + $250 = $5,030.
- Overhead at 15%: $755, bringing cost to $5,785.
- Profit at 12% markup: $694.
- Price to the client: $6,479.
Notice where the money actually is. Labor is the single biggest cost, which is why a small error in labor hours hurts far more than being a few dollars off on a box of receptacles.
What to include in an electrical estimate
The math is only half of a good estimate. The other half is how it reads to the client. A homeowner or general contractor comparing three bids will usually trust the one that’s easiest to understand, and that’s rarely the cheapest one. Every electrical estimate you send should include:
- Your company details: name, license number, insurance and contact information. Many jurisdictions require the license number on every bid.
- Project address and date, plus the drawings or walkthrough the estimate is based on.
- A plain-English scope of work, broken into areas or systems (for example “kitchen circuits”, “basement lighting”, “panel upgrade”).
- Line items or grouped totals for materials and labor. You don’t have to show your markup, but the client should see what they’re paying for.
- Exclusions and assumptions: patching, painting, owner-supplied fixtures, utility fees, hidden conditions behind walls.
- Allowances for items not yet chosen, such as light fixtures, with a clear dollar amount.
- Payment terms: deposit, progress payments and final payment.
- An expiry date, so a price built on this month’s copper cost can’t be accepted next season.
- A way to approve it: a signature line, or better, an online approval button.
Offering good, better and best options also helps. One option with standard devices, one with upgraded fixtures and smart switches, and one with a panel upgrade or surge protection. Clients like having a choice, and many will pick the middle option rather than asking you to cut your price.
Finally, keep the language simple. “Install 16 LED recessed lights on 3 dimmer circuits” is clearer than a code reference, and a clear scope protects you if there’s a disagreement later.
How long should an electrical estimate take?
A small service job can be priced in minutes. A whole-house rewire or a light commercial fit-out can take several hours: the takeoff alone might be most of that time. If you’re spending more time estimating than the job is worth, that’s a sign to standardize. Save your common items, your labor units and your markup once, and reuse them on every bid. That’s the real payoff of learning how to estimate electrical work properly: each estimate gets faster than the last.
Common ways to price electrical jobs
Once you understand how to estimate electrical work line by line, you can decide how to present the price. Most electrical contractors use one of four methods:
- Itemized (cost-plus): the process above. Most accurate, and best for larger or custom jobs.
- Per opening or per point: a set price per outlet, switch or fixture. Fast for repetitive residential work, but only if the price per point was built from real costs.
- Per square foot: useful for quick budget numbers on new construction, risky as a final price.
- Time and materials: good for service calls and unclear scopes, but clients often prefer a fixed price for project work.
Whichever you choose, build it from the detailed numbers first. A per-point price that isn’t based on real costs is just a guess with a nicer format.
Electrical estimating mistakes to avoid
- Pricing from memory. Last year’s prices and last job’s hours are a starting point, not an electrical estimate.
- Ignoring access. Old work in finished spaces often takes 1.5 to 2 times as long as the same work in open framing.
- Burying overhead. If overhead isn’t a calculated line, you’re probably not recovering it.
- No expiry date. A price with no validity window invites a client to accept it after copper has gone up.
- Skipping the review. Most expensive mistakes are simple ones a second look would have caught. See more in our construction cost estimating tips.
Using software to estimate electrical work faster
Spreadsheets work for an electrical estimate until they don’t. Once you’re sending several bids a week, copying last month’s file and editing it is where formula errors and stale prices creep in.
Electrical estimating software like QuickEstimate keeps your material prices, labor rates, overhead and markup in one place. You build the estimate from saved items, the math is done for you, and the client gets a professional proposal they can approve online. It’s the same process described above, just without the retyping.
Frequently asked questions
How do you estimate electrical work for a job?
Review the plans and scope, do a material takeoff, price materials at current cost, estimate labor hours with labor units, add permits and equipment, then apply overhead and profit. Review everything before sending an itemized proposal.
How much should an electrician charge per hour?
There’s no single right number, because it depends on your costs. Start with your true labor cost (wage plus burden), add your overhead per billable hour, then add profit. An electrician paid $30 an hour can easily cost $40 to $45 an hour to employ, before overhead or profit.
What is a labor unit in electrical estimating?
A labor unit is the number of hours it takes to install one item, such as a receptacle, fixture or foot of conduit. You multiply each item’s quantity by its labor unit to get total labor hours, then adjust for site conditions.
How much waste should I add for wire?
Most contractors add 5 to 10% to measured wire runs to cover waste, slack and short offcuts. Use the higher end on remodels and jobs with lots of short runs.
Should electricians charge for estimates?
Many contractors give free estimates for standard jobs and charge for detailed design work or large commercial bids. Some credit the estimate fee back if the client hires them. Either way, make the policy clear before you visit the site.
The bottom line
Learning how to estimate electrical work isn’t about finding a magic price per outlet. It’s about following the same steps every time: scope, takeoff, materials, labor, extras, overhead and profit, then a review. Do that consistently and your bids get faster, more accurate and more profitable.
If you’d like to stop rebuilding every estimate from scratch, try QuickEstimate free and turn your next electrical estimate into a client-ready proposal in minutes.